Introduction
[ARCHIVED] Make your own BibleBox
 These are the instructions for the first version of the BibleBox which are no longer supported, but remain here for those still using the TP Link MR3040 device. Instructions on setting up the new BibleBox will be available soon.

These instructions are based on the TP Link MR3040 ver 2.3 with Sandisk Cruzer Fit Micro 8GB usb drive. If you use different brand USB drives note that you will need to extend times stated for setup. Particularly if using CHEAP USB drives….
MOST of the problems people have when installing are because they havent followed the instructions as written or when using different hardware, ended the setup process before completion.
Gather the Hardware
Gather the BibleBox Hardware
- Portable wifi router – TP-Link MR3040 ver 2.3 or ver 2.4, or 2.5 (USA – Amazon, Australia – check eBay, or I-Tech.com.au)
- make sure you purchase MR3040 v2 hardware – the v1 has been discontinued by TP Link and I have been getting reports that v1 will not work. (hardware version information is shown under the battery in the TP MR3040)
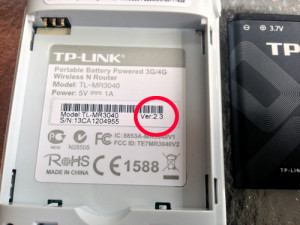
MR3040 Model Number (2.3) underneath battery
- make sure you purchase MR3040 v2 hardware – the v1 has been discontinued by TP Link and I have been getting reports that v1 will not work. (hardware version information is shown under the battery in the TP MR3040)

- USB memory stick (Amazon 8GB, Amazon 16GB) formatted as FAT32. My preference is the Sandisk Cruzer Fit. (also see this post on Sandisk’s Ultra Fit USB 3 drive)
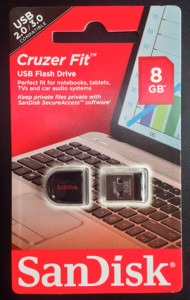
BibleBox Sandisk Cruzer Fit micro USB

Download the Software
Download the BibleBox Software
- Download the appropriate pack of files to your computer depending on the router being used:
- The same installation files in the packs above are available as separate downloads if necessary:
- openwrt file – new firmware for the Version 2 TP-MR3040 – bin file – 4MB
- install_librarybox zip file – installs base software onto TP-MR3040 – zip file – 11Mb
- BibleBox files – alters functionality and rebranding BibleBox – zip file – 4.9MB.
Build a BibleBox
BibleBox – the Build
- Open and charge your TP MR3040 version 2 wifi router
- Ensure the USB stick you are using is formatted as FAT32 and contains no other files and label/rename it “BibleBox”
- unzip the downloaded install_librarybox.zip file onto your computer and copy the install folder onto your USB
- now copy the downloaded openwrt bin firmware file also onto your USB
- eject the BibleBox USB from your computer
- plug the BibleBox USB stick into the TP-MR3040 wifi router’s USB port
- Make sure the TP-MR3040 mode switch is set to WISP
- Connect the power supply to the TP-MR3040, and using the supplied ethernet cable, connect the TP-MR3040 to your computer (you may need to turn off your computers wifi and disconnect from any network to ensure a clean connection to the TP-MR3040)
- Turn on the TP-MR3040
- Check your computers IP address is anywhere in the range 192.168.0.2 – 100 with subnet 255.255.255.0 (this will show you that your computer and the router are able to communicate)
- On your computer, open your web browser and navigate to 192.168.0.1 – (this is the TP-MR3040 default IP address) -NOTE this address will change later after the installation of openwrt to 192.168.1.1
- when prompted to login use the default TP Link username and password which is, username = admin, password = admin The TP-Link web admin screen for the TP-MR3040 will open.
- Navigate to: System Tools > Firmware Upgrade, and from your computer browse to and select the openwrt firmware bin file for the MR3040 (downloaded earlier)
- Click the Upgrade button and click OK to confirm the upgrade.
- The TP-Link progress bar in the browser window will indicate that the MR3040 upgrade has finished but WAIT, the upgrade process will take around 15 – 20 minutes so JUST SIT TIGHT. During the firmware flash DO NOT unplug the power or ethernet cable from the TP-MR3040 or computer! Dont be fooled by LEDs flickering or staying off – be patient.
- After a couple of minutes the web browser will give you a “Page not Available” message. Just wait.
- After around 15 – 20 minutes change your IP address to 192.168.1.2 and try with your web browser to access the BibleBox router on 192.168.1.1. If the librarybox page appears this indicates that installation is complete. If it doesnt wait a few more minutes, turn your wifi on, connect to “Librarybox – Free Content” and reload the page.
- I like to confirm everything has installed by connecting to the Librarybox wifi with my phone and checking the page loads.
- Once the TP-MR3040 has finished the firmware upgrade and Librarybox install, turn it off and remove the USB drive and ethernet cable.
- Put the BibleBox USB drive back in your computer
- Time to add BibleBox customisation files – On the BibleBox USB browse to the folder named Librarybox and inside that folder select the following folders – Config, Content, Shared – and delete them
- On your computer, unzip the install_BibleBox file you downloaded to your computer, you will see 3 folders – Content, Config and Shared.
- Copy these three folders and their contents to the “Librarybox” folder on the BibleBox USB.
- Now you are ready to copy your files for sharing to the /BibleBox/Shared folder. There is a starter folder of shareable files available to download here (100MB, mixed files – audio, video, text, images).
- You can copy files into the different folders in Shared, or just place them into the Shared folder itself.
- NOTE – if you modify the location or names of any of the Shared folders on the USB you will need to edit the html files on the webpages so the hyperlinks to those Shared folders continue to work correctly.
- Put the BibleBox USB back into the MR3040 and turn it on. It takes about 4-5 minutes to start up and be ready to share files over wifi.
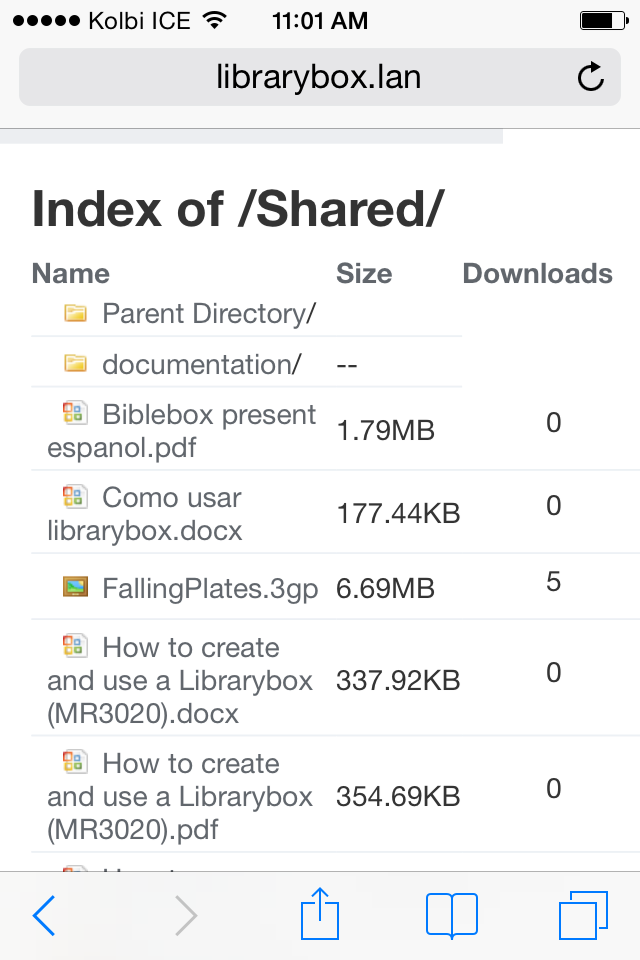
- Once you see the “BibleBox files” wifi network wait about 30 seconds, then join the “BibleBox files” SSID (wifi network name) and in a web browser navigate to http://BibleBox.org (or any http web address can be used, BibleBox.lan will open)
- Check out how your mobile device handles the various files you are sharing on the BibleBox.
- On iPhone try the MediaTap browser if you have trouble saving files
- Your BibleBox is complete! But to make it an official BibleBox you’ll need a BibleBox sticker…..contact me for a free one
Recommended - Securing Access to BibleBox Admin
Securing admin access to your BibleBox device
Now your BibleBox is setup you need to secure access to the administration of the BibleBox router. This isnt securing the wifi network, but securing access to the settings of the device. you can also set the date and time during this process.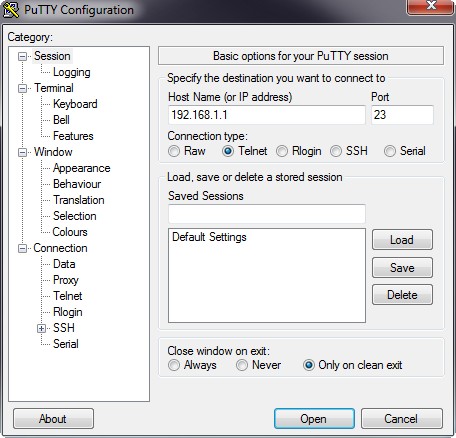
- Turn your BibleBox on
- Connect to the “BibleBox files” wifi SSID with your laptop and telnet into it (on a Mac use Terminal, Windows try PuTTY – (NOTE: Terminal and PuTTY are applications which enable you to login to the BibleBox device and change software installed on it. Terminal is already installed on your Mac and for more details on PuTTy check out – http://the.earth.li/~sgtatham/putty/0.60/htmldoc/Chapter1.html )
Mac terminal - telnet 192.168.1.1
- Run the BibleBox advance setup script by typing:
box_init_setup.sh
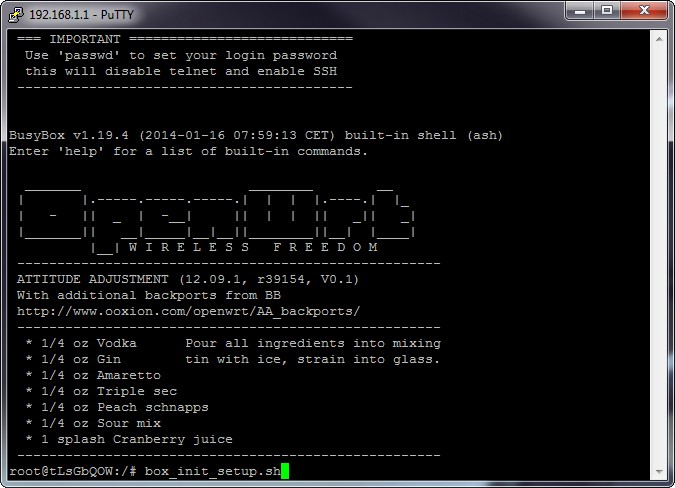
- Then simply follow the instructions to set a Password
- Select option 1 for Setting Password and Enable SSH
- Once you’ve setup your password you will login to the BibleBox via SSH:
ssh root@192.168.1.1
- Now your BibleBox is secure with your chosen Password
- While here, select option 2 and set the date and time.
Recommended - Modify the Chatbox Name
Modify the Chatbox name
Using Terminal or PuTTY app:
- connect your BibleBox to your computer
- make sure your computer has IP address 192.168.1.2 or in the range 192.168.1.xxx
- use Terminal (Mac) or PuTTY (PC) ssh into BibleBox ssh root@192.168.1.1
- in Putty, at the login prompt enter the user – root, then the password
- change the directory to the location of the file we want to modify type: cd /opt/piratebox/conf
- to modify the initial chat box content txt file type –
vi chat_init.txt
- press i to go into edit mode
- make your edit
- press Esc to go back to command mode
- type :w to save your edit, press enter/return key
- type :q, then press enter/return to quit editing
- Restart the BibleBox to apply the changes – reboot -f
Recommended - Changing the Styling of Shared Files pages
Using CSS for better styling – Brendan Blowers
Brendan serves with MAF in Haiti, supporting and leading various Technology and education projects. Here are his instructions for modifying the look and feel of the shared files section using CSS.
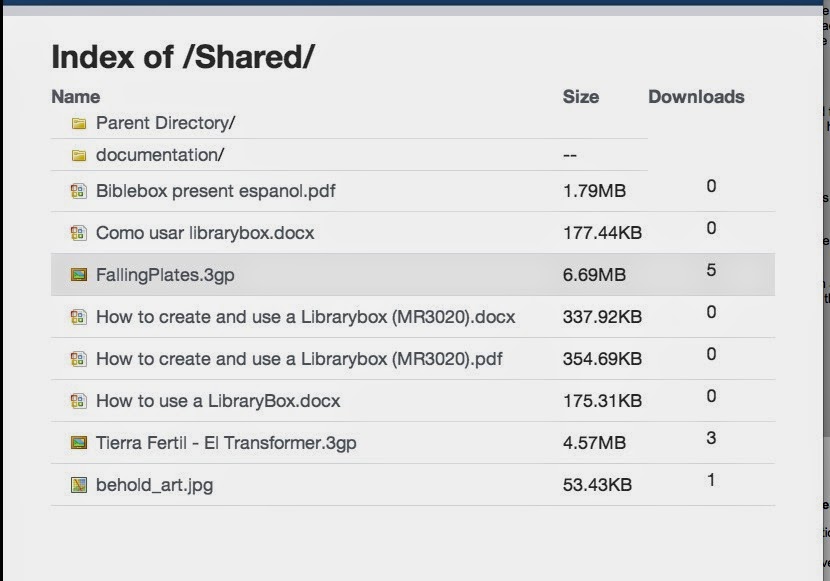
How to customize it using the styles in the above screenshots:
- Download CustomCSSDirList with a personalized “dir-generator.php” file and three custom CSS files. If you follow the below directions, your directory listing will appear like the one above
- First, put your BibleBox USB drive into your computer and copy the “dir-generator.php” file from the CustomCSSDirList folder to the root folder of your USB drive.
- Copy the three CSS files into the USB folder LibraryBox/Content/css
- Plug the drive back into the BibleBox and start it up
- SSH into your BibleBox. Copy the file “dir-generator.php” from the USB drive to the folder /opt/piratebox/www (ie, run the command: cp /mnt/usb/dir-generator.php /opt/piratebox/www)
- That replaced the default dir-generator.php file with the customized one, which modifies the output of the directory listing and points to the three CSS files to style the output. It also activates the filetype icons and cleans up the file listing a little.
Also see how to use h5ai Styling here – h5ai
Optional - Enable FTP Access
Enabling FTP access to the BibleBox
The BibleBox can be setup with FTP access which makes it very easy for you to transfer new files for sharing to it with being physically connected, but through the BibleBox wifi connection.
- Turn on the BibleBox and connect to the wifi
- From you computer use Terminal (OS X) or PuTTY (Win) to SSH into the Biblebox: (remembered the Password you created earlier?)
ssh root@192.168.1.1 (just use root if on PuTTY)
- Run the advance setup script (same script as used when setting up Password)
box_init_setup.sh
- Select Option 3 –
3 - Start FTP configuration
- Youll see the following menu appear :
 Choose an option: 3
------------------------------------------------------
   Current configuration:
------------------------------------------------------
   FTP enabled                : yes
   Admin access               : yes
   Special SYNC access        : yes
   SYNC Port                  : 54321
   Anonymous login possible   : no
 --
   FTP Synchronisation active : no
   FTP Sync hostname          : empty
   FTP Sync password          : empty

------------------------------------------------------
  1 -  Enable / Disable FTP
  2 -  Enable / Disable Admin Access
  3 -  Enable / Disable Sync Master
  4 -  Enable / Disable Anonymous Access
  5 -  Set password for Sync Master
  6 -  Set password for Admin Access

  7 -  Enable Sync Client
  8 -     Client host
  9 -     Client password

 Enter h and a number for help about the topic. For example, h8 for Client host help
 Every other button is a clean exit.
- When you make a selection it will enable/disable the options, so select option 1 for example to disable FTP as by default its enabled
- Select Option 6 to Set a Password for your FTP access
- Now to exit the menu press X (or any other button) and restart the BibleBox (type: reboot -f)
- Connect to the BibleBox wifi, run your favourite FTP app using:
- server address 192.168.1.1
- username – “nobody”
- password = whatever password you created